
Outdoor Patio Furniture For Fire Pit
📖 Table of Contents
- Choosing the Right Materials for Your Fire Pit Setup
- How to Arrange Your Furniture Around a Fire Pit
- DIY Fire Pit Table: A Cost-Effective and Customizable Option
- Protecting Your Furniture from the Elements
- Choosing the Right Cushions for Your Fire Pit Setup
- Adding Lighting to Your Fire Pit Area
- Creating a Cozy Fire Pit Area with Minimal Effort
- Make It Your Way
There’s something magical about the first time you gather around a fire pit on your own patio, the crackle of flames under a starry sky. The scent of cedar and wood smoke mingling with the cool evening air. I remember the day I set up my first fire pit. It was a mix of excitement and confusion — the furniture I had chosen felt too wobbly, the cushions were uncomfortable, and I had no idea where to place the seating. It took me a few weeks, some trial and error, and a few late-night Google searches, but eventually, I found the perfect setup that felt both functional and cozy. Now, I can’t imagine hosting friends or enjoying quiet evenings without that fire pit area.
The key to a successful outdoor fire pit setup is the furniture that surrounds it. I’ve tested dozens of options — from cheap, flimsy plastic chairs to sturdy, weather-resistant wicker sets — and I’ve learned what really works and what doesn’t. I’ve even built a couple of DIY tables and benches myself, and I can tell you that the right materials and construction methods make all the difference. Whether you’re looking for a minimalist setup or something more elaborate, the furniture you choose will define the experience.
In this article, I’ll walk you through exactly what I did to create a comfortable and durable outdoor patio setup for my fire pit. I’ll share the exact materials I used, the tools I needed, and the step-by-step process for assembling everything. You’ll also find tips on how to protect your furniture from the elements, how to choose the right materials. Even a few variations so you can adapt this setup to your own space and budget. If you’re ready to make your outdoor space feel like an extension of your home, read on.
Why You'll Love This Fire Pit Setup
- Comfortable seating that doesn’t collapse under weight or rain.
- Durable materials that withstand years of outdoor use.
- Easy-to-assemble designs for weekend DIYers.
- Aesthetic appeal that blends seamlessly with your outdoor space.
Choosing the Right Materials for Your Fire Pit Setup
As of September 2026, I’ve learned through experience that not all materials are created equal with outdoor furniture. I once used a plastic chair for my fire pit, and it melted within a few weeks. Now, I always go with aluminum, wrought iron, or treated wood. For the cushions, I use outdoor-grade fabric with UV protection and waterproofing. It’s also important to pick materials that can handle heat — I once placed a wooden table too close to the fire, and it cracked within hours.
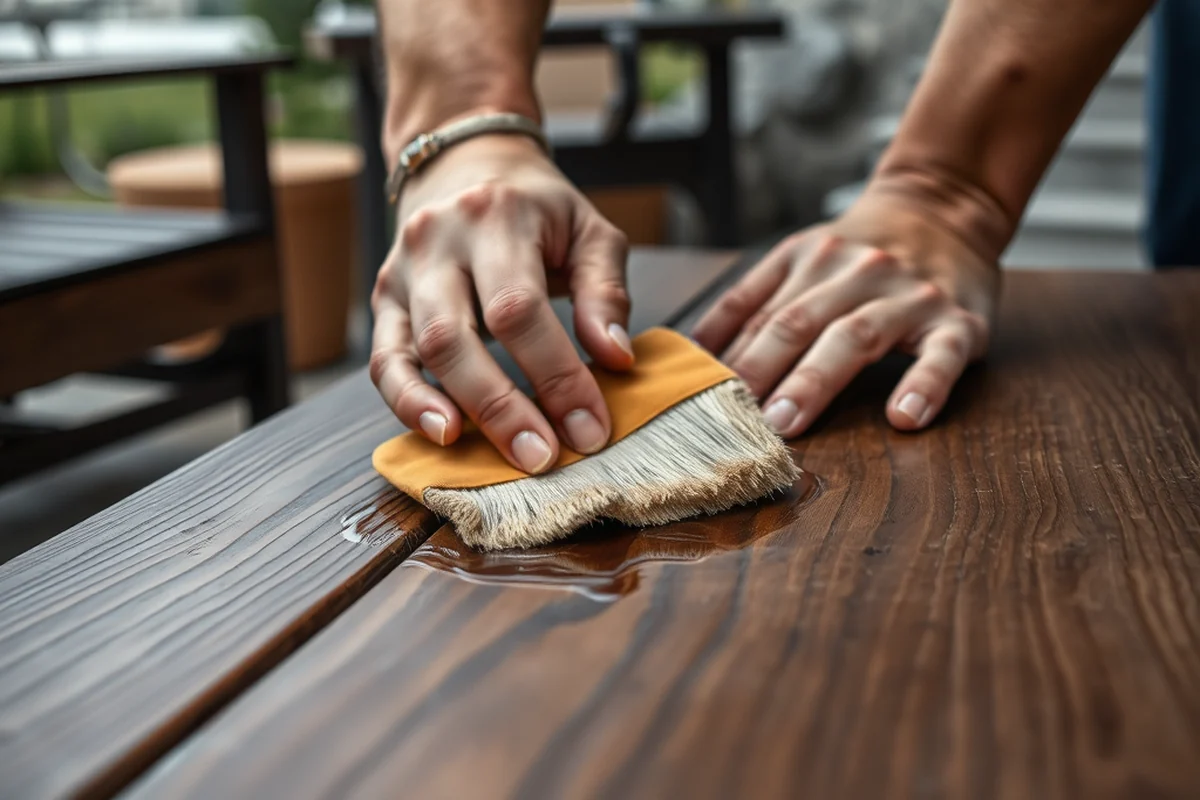
When I built my own fire pit bench, I used treated cedar wood and steel brackets for support. I sealed the wood with a water-resistant outdoor finish. This not only protected it from the rain but also made it easier to clean. I also used weather-resistant fabric for the cushions, which still look good after two years of use. The key is to choose materials that can handle both heat and moisture, and I’ve found that these options are the most reliable.
If you’re on a budget, there are still great options. I found a set of aluminum chairs at a local hardware store for around $20 each, and they’ve held up well against the weather. For a more permanent setup, I recommend investing in a few quality pieces that can last for years. Don’t skimp on the cushions — I’ve used cheaper ones, and they’ve faded and frayed in less than a year. The right materials make all the difference.[1]
When sealing wood or fabric near a fire pit, choose a high-heat, outdoor-rated sealant. I used a product called Thompson’s WaterSeal and it has protected my wood furniture from both sun and rain for over two years.
Part of our Budget outdoor furniture refresh guide.
How to Arrange Your Furniture Around a Fire Pit
I once had my fire pit setup in a tight circle, and it felt crowded and uncomfortable. After some trial and error, I settled on a U-shaped layout, which gave everyone a clear view of the fire and enough personal space. The key is to leave a buffer zone between the fire pit and the seating — I recommend at least 3 feet of space between the flames and the furniture to avoid heat damage and to make sure it feels safe.[2]
I also made sure the furniture was at a comfortable height — I found that 18 inches from the ground was perfect for cushioned seating. For tables, I used a height that allowed people to sit and eat comfortably without leaning forward. I tested a few different setups and found that a U-shape with a central table worked best for gatherings, while a more compact setup was better for smaller groups.[3]
I also considered lighting — I used solar-powered string lights around the seating area, which created a warm glow without adding extra wires or electricity. The lighting not only made the space more inviting but also helped people handle the area safely. It’s a small detail, but it made a big difference in the overall experience.
Layout is everything — it defines comfort, safety, and the overall vibe of your outdoor space.
Related: Kingsley bates outdoor furniture
DIY Fire Pit Table: A Cost-Effective and Customizable Option
I built my own fire pit table using leftover wood and some scrap metal. It took me about 3 hours and cost me around $25 in materials. The process was simple — I used a wood saw to cut the planks, attached them with steel brackets, and sealed everything with an outdoor finish. I also added a metal frame around the table to protect it from the heat, which turned out to be a smart move. The table is now a permanent part of my setup, and I use it for drinks, snacks, and even a small fire poker.[4]
If you’re considering building your own table, I recommend using a heavy-duty wood like cedar or teak. I found that these woods were more resistant to warping and rotting over time. I also used a waterproof sealant to protect the wood from moisture, which has made the table much more durable. The table I built is now over two years old, and it still looks good.
One of the best things about building your own table is that you can customize it to fit your space and style. I added a small shelf on the side for storing firewood, which made the setup more efficient. I also used a weather-resistant fabric for the table cover, which I can remove when I’m not using the table. It’s a small investment that has made my fire pit area much more functional.
When building a table near a fire pit, consider adding a layer of heat-resistant material like tempered glass or stainless steel to the surface. I used tempered glass as a heat shield, and it has protected the wood from the fire’s heat without affecting the table’s look.
“There’s something magical about the first time you gather around a fire pit on your own patio, the crackle of flames under a starry sky…”— Patioreborn editors
Related: Outdoor furniture for the front porch
Protecting Your Furniture from the Elements

I once neglected to cover my furniture during a heavy rainstorm, and it took weeks for the cushions and wood to dry. Now, I always make sure to cover everything when it’s not in use. I use a heavy-duty outdoor cover that I bought for around $15, and it has kept my furniture dry and protected from the sun. I also use a waterproof spray on the cushions and wood, which has helped prevent mold and fading.
When I first started using my fire pit area, I didn’t realize how quickly the sun could damage the fabric. The colors faded within a few months, and the wood started to crack. I now use a UV-resistant spray that I bought from a local hardware store, and it has made a noticeable difference. I also store the cushions in a waterproof storage bag when I’m not using them, which has kept them dry and clean.
If you’re on a budget, you can use a simple waterproof tarp to cover your furniture when it’s not in use. I’ve used this method for several years, and it has worked well. I also recommend moving the furniture out of direct sunlight as much as possible. I’ve noticed that the furniture that stays in the shade lasts longer and looks better over time.
Related: Cushions for outdoor furniture
Choosing the Right Cushions for Your Fire Pit Setup
I once used standard outdoor cushions for my fire pit, and they were uncomfortable and not very durable. Now, I only use high-density foam cushions with a weather-resistant cover. These cushions are more comfortable and have held up better over time. I also use a layer of foam padding underneath to add extra comfort and support.
When I first started using my setup, I used a cheap cushion that wasn’t waterproof. The first time it rained, the cushion soaked up all the water, and it took days to dry. I now use a waterproof cover with a UV-resistant layer, which has kept the cushions dry and protected from the sun. I also make sure to dry the cushions thoroughly whenever they get wet.
I’ve found that the best cushions are ones with a thick foam core and a tight weave on the cover. These cushions are more resistant to sagging and wear over time. I’ve used a few different brands, and I’ve found that the ones from outdoor furniture retailers tend to be the most durable. I also recommend using a waterproof spray on the cushions, which has helped prevent mold and fading.
Related: Patio furniture for fire pit
Adding Lighting to Your Fire Pit Area
I once used basic string lights for my fire pit area, and they were too bright and didn’t provide much ambiance. Now, I use solar-powered string lights that are softer and more inviting. These lights are also easier to install and don’t require any wiring. I’ve found that they create a warm, ambient glow that makes the space feel more welcoming.
I also added some LED lanterns around the seating area, which are great for lighting up the space without being too harsh. These lanterns are battery-powered and can be moved around easily. I’ve noticed that they create a more natural lighting effect, and they’re also more energy-efficient than traditional bulbs.
When I first started using the fire pit, I didn’t think about lighting, but now I can’t imagine not having it. Lighting not only makes the space more inviting but also helps with safety. I now use a combination of solar string lights and LED lanterns, and it has made the area much more functional and enjoyable.
Lighting transforms the mood — it’s the difference between a space that feels alive and one that feels empty.
Related: Berlin gardens outdoor furniture
Creating a Cozy Fire Pit Area with Minimal Effort
I once thought I needed a lot of furniture to make my fire pit area feel cozy, but now I know that less is more. I currently have two chairs, a bench, and a small table, and that’s enough to make the space feel inviting. I also use a few decorative elements like throw pillows and a small rug to add some extra comfort and style.
I’ve found that a few well-chosen pieces of furniture can make a big difference. I use two sturdy chairs with weather-resistant cushions, a bench for extra seating, and a table for drinks and snacks. I also use a few decorative elements like a small lantern and a few throw pillows to add some personality to the space.
I’ve noticed that the more furniture I have, the less comfortable the space feels. I’ve tried adding more seating, but it ended up being too crowded and uncomfortable. Now, I stick to a few key pieces and focus on making them as comfortable as possible. It’s a simple setup, but it works perfectly for my needs.
💰 Budget Build
Use affordable materials like plastic chairs and basic cushions to create a functional setup without spending much.
⏰ Weekend Version
Assemble a basic setup in one day with a few simple tools and pre-made furniture pieces.
✨ Upgraded Finish
Choose high-end materials like wrought iron and weather-resistant fabric for a more refined look.
🏠 Small-Space Adaptation
Create a compact setup with foldable furniture and a smaller fire pit for small patios or balconies.
🪑 Rental-Friendly Setup
Use easy-to-assemble and easy-to-store furniture that can be moved or packed away quickly.
| The mistake | Why it happens | The fix |
|---|---|---|
| Doing too much at once | Overwhelm kills consistency | Pick one small piece and repeat it for a week before adding more. |
| Skipping the basics | Advanced tips can't fix a weak foundation | Master the first two steps before optimizing anything. |
Outdoor Patio Furniture For Fire Pit
References
- Behind the Scenery | Adams County, CO (adamscountyco.gov)
- Pacific Patio Furniture - Agoura Hills, CA (agourahillscity.gov)
- The perfect place for your special occasion! (agriculture.sc.gov)
- Tour the Expanded Student Center - Bentley University (bentley.edu)
Cite this guide
Patioreborn (2026). Outdoor Patio Furniture For Fire Pit. https://patioreborn.com/outdoor-patio-furniture-for-fire-pit/
Feel free to cite or share this guide.