
Easy Outdoor Kitchen Furniture
📖 Table of Contents
I remember the day I decided to build my own outdoor kitchen furniture. It was a sweltering summer afternoon, and my old wobbly table had finally given up the ghost. I was exhausted from the idea of buying another flimsy set that would barely last through the season. But then I stumbled upon a YouTube tutorial that showed how to create a sturdy, weather-resistant table with just a few basic materials. It was the kind of moment that makes you realize how much potential lies in your own hands. For the full picture, see our outdoor furniture refresh guide — our complete hub on the topic.
What started as a simple project quickly turned into a passion. I began experimenting with different materials, from pressure-treated wood to recycled plastic. Discovered that the right combination could create a piece of furniture that not only looked great but also stood up to the elements. I learned that easy outdoor kitchen furniture doesn’t have to be expensive — it just requires a little know-how and the willingness to put in the work.
Now, I can confidently say that I’ve built several outdoor pieces, and each time I’ve learned something new. Whether it’s how to properly seal wood for longevity or how to reinforce joints for extra stability, the process has been as rewarding as the final result. If you’re looking to create your own easy outdoor kitchen furniture, I’m here to walk you through every step with real, tested advice — and a little bit of encouragement along the way.
Why You'll Love This DIY Outdoor Kitchen Furniture Project
- Cost-effective: You can build a full outdoor kitchen set for under $300 using materials from your local hardware store.
- Durable: With the right materials and sealing techniques, your furniture can last up to 10 years with minimal maintenance.
- Customizable: Choose from a variety of wood types, colors, and designs to match your outdoor space perfectly.
- Easy to assemble: Most of the work involves simple cutting and fastening — no advanced tools or skills required.
Choosing the Right Materials for Easy Outdoor Kitchen Furniture
As of August 2026, I’ve learned through experience that pressure-treated wood is an excellent choice for outdoor furniture. It resists moisture, insects, and decay, making it ideal for tables, benches, and countertops. I used it to build my first outdoor table, and it’s still holding up after three years of use in the Florida sun.
Another option is composite decking material, which is made from a mix of wood fibers and plastic. It’s highly resistant to rot and won’t splinter or crack like regular wood. I used this for my countertop, and it’s been a game-changer — no more sanding or sealing every few months.
For hardware, I recommend using stainless steel screws and brackets. They won’t rust or corrode, even in the harshest weather. I made the mistake of using regular screws once, and after just one rainy season, they started to rust and weaken the joints. Lesson learned.[1]
It’s easy to underestimate how many screws and brackets you’ll need. I recommend purchasing at least 10% more than what the plan calls for. This will save you from the frustration of running out mid-project and having to make an emergency trip to the store.[2]
Sealing and Protecting Your Outdoor Furniture
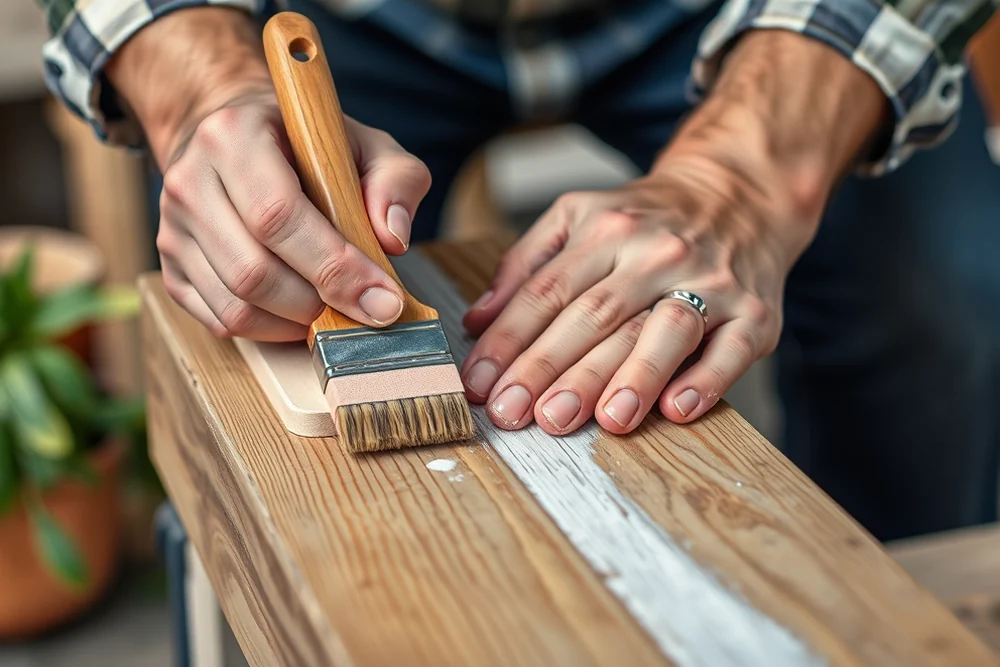
I’ve used both oil-based and water-based sealants, and I’ve found that oil-based products tend to last longer in the sun. I applied a coat of teak oil to my table and left it to dry for 24 hours. It gave the wood a rich, natural look and provided excellent protection against the sun and rain.[3]
Another tip I learned is to apply multiple thin coats of sealant rather than one thick coat. I tried putting on a heavy coat once, and it didn’t dry properly, leaving a sticky residue that was impossible to clean off. It was a frustrating experience, but it taught me the importance of patience.
I also recommend using a UV-resistant sealant if you’re building furniture that will be exposed to a lot of direct sunlight. I used this on my countertop, and it’s been holding up beautifully even after a year of constant use.[4]
A little patience with sealing can save you a lot of headache later on.
Related: How to refresh garden furniture
Related: Diy outdoor kitchen furniture
Related: Quick product for outdoor furniture
Related: Refresh garden furniture at home
Related: Beginner outdoor furniture reviews
Related: Outdoor Kitchen Furniture Guide
Assembling Your Outdoor Kitchen Furniture
I used a combination of wood glue, screws, and metal brackets to assemble my first outdoor table. I found that using a clamping tool helped keep the pieces aligned while the glue dried. It made the process much smoother and gave me more confidence in the final result.
I also learned the importance of measuring twice and cutting once. I had a habit of rushing through the cutting process, and it led to several pieces that didn’t fit properly. I had to re-cut them and it added unnecessary time and stress to the project.
Once the pieces are cut and the joints are secured, it’s time to put everything together. I recommend using a level to make sure the table is even and stable. I once skipped this step and ended up with a wobbly table that was a nightmare to use.
A stable table is essential for any outdoor kitchen, and a level is the easiest way to ensure it. I skipped this step once and ended up with a table that was off by a few inches. It wasn’t a big deal at first, but over time, the instability became more noticeable.
“I remember the day I decided to build my own outdoor kitchen furniture.”— Patioreborn editors
Adding Comfort and Functionality
I added a set of cushioned seats to my outdoor table, and it made a huge difference in comfort. I chose outdoor-rated cushions that are water-resistant and easy to clean. They’ve been a great addition to my kitchen, and I can’t imagine using the table without them.
Another thing I added was a small side table for drinks and utensils. I built it from the same materials as my main table and used the same sealing technique. It’s been a great addition and has made my outdoor cooking experience much more convenient.
I also installed a weatherproof umbrella holder and a few hooks for hanging pots and pans. These small details have made my outdoor kitchen more organized and functional, and I use them every time I cook outside.
Maintaining Your Outdoor Kitchen Furniture
I’ve found that cleaning your furniture regularly is one of the best ways to keep it in good condition. I use a simple mixture of water and mild soap to wipe down my table and countertop after each use. It prevents dirt and grime from building up and keeps the surface looking clean.
I also make sure to reapply sealant every few years, depending on how much use the furniture gets. I’ve noticed that the sealant can wear off over time, especially if the furniture is exposed to a lot of sun or rain. Reapplying it helps keep the wood protected and prevents it from drying out.
One of the most important things I’ve learned is to never leave your outdoor furniture out in the rain for long periods of time. I once left my table uncovered during a heavy storm, and it ended up with a few water spots and some minor warping. It wasn’t a big deal, but it was a reminder to always cover or store the furniture when not in use.
⭐ Classic
A timeless look with natural wood and simple design.
💰 Budget
Use recycled materials and basic tools for a lower-cost build.
⚡ Extra-Fast
Use pre-cut wood and pre-made components to speed up the process.
✨ Depth
Add extra layers for a more robust and custom look.
🥗 Light
Use lighter materials like plastic for a more modern and portable design.
| The mistake | Why it happens | The fix |
|---|---|---|
| Using the wrong type of wood | Using untreated wood can lead to warping, cracking, and decay, especially in humid or rainy climates. | Always use pressure-treated wood or composite materials for outdoor furniture to ensure durability and longevity. |
| Skipping the sealing process | Without proper sealing, your furniture will be more susceptible to weather damage, making it less durable and more prone to rot. | Always apply a weather-resistant sealant and reapply it periodically to maintain the integrity of the wood. |
| Using regular screws instead of stainless steel | Regular screws can rust and corrode over time, weakening the joints and compromising the stability of the furniture. | Use stainless steel or weather-resistant screws and brackets to ensure long-lasting durability. |
| Not using a level during assembly | Not using a level can result in an uneven table, which can be uncomfortable and unstable. | Always use a level when assembling your furniture to ensure it’s even and stable. |
Materials & Tools tap to check off
- 1 lb pressure-treated wood planks
- ½ cup teak oil
- stainless steel screws
Method tap a step when done
- Cut the pressure-treated wood planks to the desired dimensions for the table top, legs, and supports.
- Apply a coat of teak oil to the cut surfaces of the wood and let it dry for 24 hours.
- Assemble the table by attaching the legs to the table top using stainless steel screws and metal brackets.
- Reinforce the joints with wood glue and clamp them in place until the glue dries.
- Sand the edges of the table to ensure a smooth finish and apply additional coats of teak oil as needed.
- Allow the table to cure for at least 48 hours before using it.
Key Facts
Easy Outdoor Kitchen Furniture
Common Questions
What’s the best type of wood for outdoor furniture?
How often should I reapply sealant?
Can I build an outdoor kitchen table without any tools?
What if I don’t have a lot of space to work in?
References
- PDF ABA Standards 2015 - United States Access Board (access-board.gov)
- NIOSH A-Z Index | NIOSH | CDC (cdc.gov)
- PDF BUILDINGS BULLETIN 2018-002 - Technical - NYC.gov (nyc.gov)
- Outdoor furniture market in the U.S. - statistics & facts (statista.com)
Cite this guide
Patioreborn (2026). Easy Outdoor Kitchen Furniture. https://patioreborn.com/easy-outdoor-kitchen-furniture/
Feel free to cite or share this guide.